
The Value Lookup element in ActiveCalculator is a powerful tool designed to simplify complex calculations by finding values from a spreadsheet table based on user inputs. This feature eliminates the need for intricate conditional formulas, streamlining your calculator's functionality and enhancing user experience.
Adding and Configuring a Value Lookup Element
To get started with the Value Lookup element:
- Click on the "Value Lookup" element in the calculator editor to add it to your project.
- Click on the newly added Value Lookup element in the editor to open the right sidebar settings.
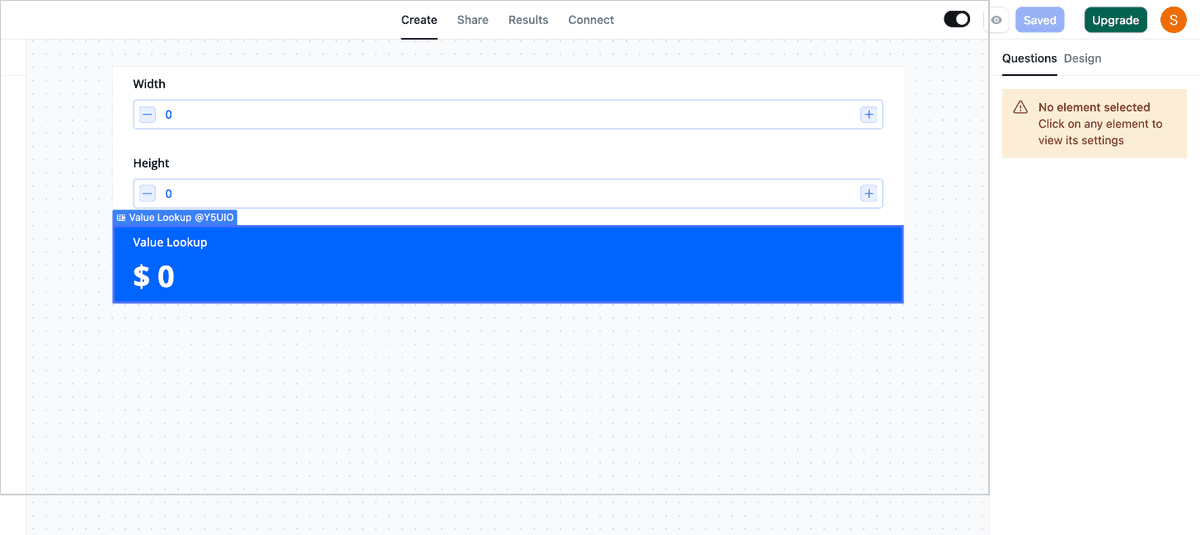
- In the sidebar, click on the "Settings" tab to access the Value Lookup Element Settings Options.
Customizing Value Lookup Settings
Let's explore the various settings available for customization:

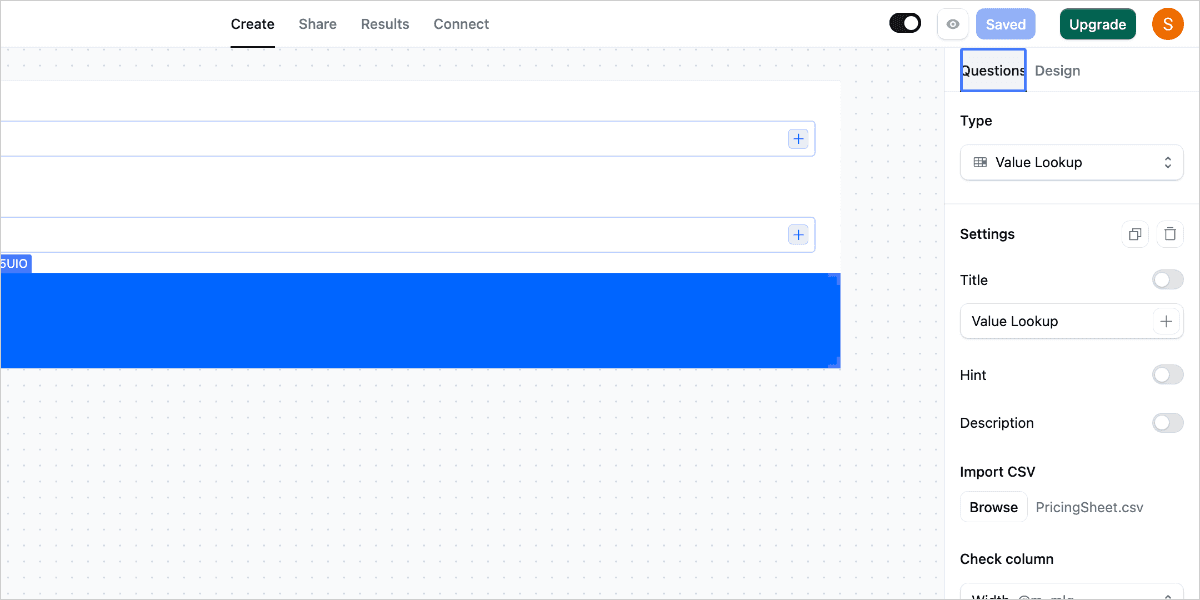
Title, Hint, and Description
- Title: Enter a clear title for your Value Lookup output. To add a variable to the title, click the PLUS button on the right side of the title settings.
- Hint: Enable this to provide additional context. It appears as a small info icon next to the element title.
- Description: Add more detailed information under the title. You can also include variables by clicking the PLUS button next to the description settings.
Importing CSV Files
Click the "Import CSV" button to browse and upload your prepared CSV file containing the lookup data.
Configuring Columns and Rows
Use the "Check columns and rows" selectors to control which input values are used to look up imported table data. Select the appropriate variables for columns and rows to check against.

Setting Default Value and Variant
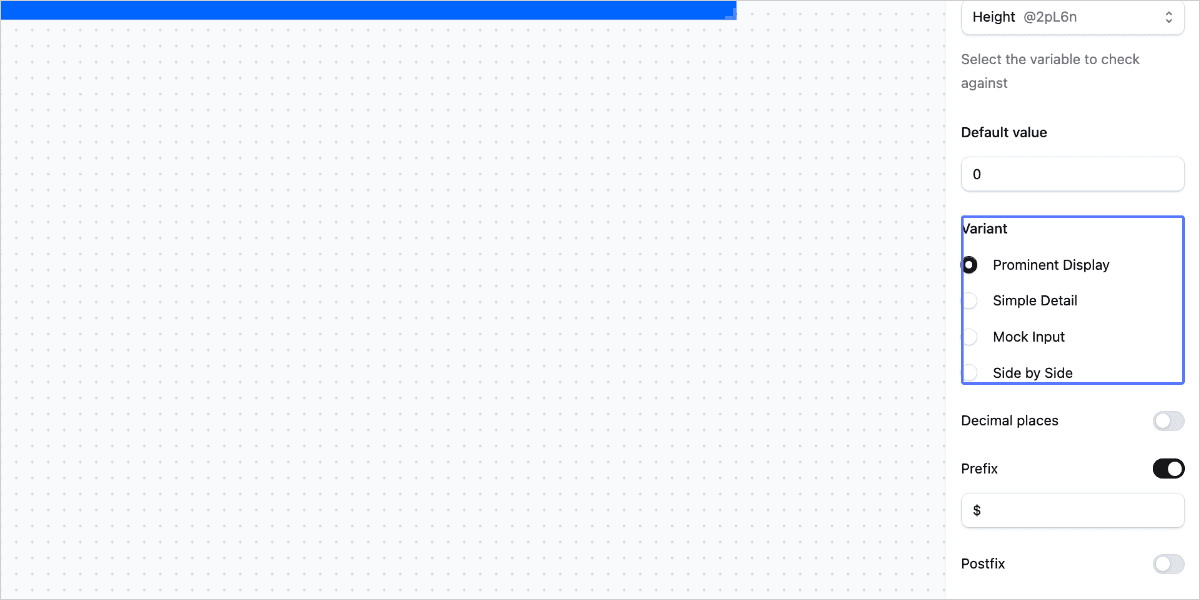
- Default Value: Set the initial number that appears in the value lookup output field when the calculator loads.
- Variant: Choose from four output styles:
- Prominent display (Bigger and bold)
- Simple detail (Small and light)
- Mock Input (Input element-like style)
- Side by side (Label and output side by side)
Adjusting Decimal Places, Prefix, and Postfix
- Use the Decimal Places slider to set the number of digits after the decimal point.
- Add a Prefix to be displayed before the result.
- Add a Postfix to be displayed after the result.
Preparing a CSV File for Value Lookup
To ensure your CSV file works correctly with the Value Lookup element, follow these guidelines:
- The first row and Column A data are used to find values in the table.
- First row data corresponds to the "Check columns" selector.
- Column A data corresponds to the "Check rows" selector.
- Data in the first row and Column A can be expressed as a range (e.g., "1 to 10") or specific value.
- Ranges should not overlap or share start/end values.

- Use a period (.) as the decimal separator for all values.
- The value table must contain only numeric values.

How Value Lookup Works
Value Lookup element looks up a value in a CSV file based on two values. One from the first row and one from the first column.
For the value lookup element to output a result, it needs two values that will be taken from your calculator elements. These values can be static or dynamic based on the customer’s choices.
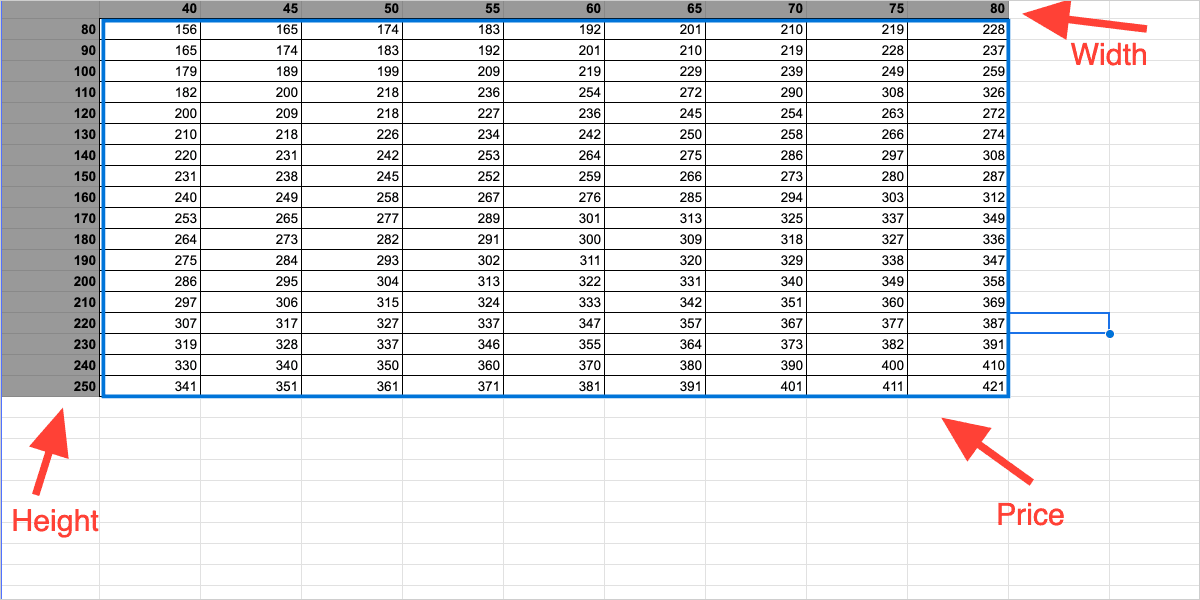
Here is an example of a correctly prepared sheet for a wallpaper price calculator:
Let's illustrate with an example of a wallpaper price calculator:
- Create a CSV file with width ranges in the first row and height ranges in Column A.
- Add two input elements in your calculator for width and height.
- Configure the Value Lookup element to check columns (width) and rows (height).
Value Lookup element in this case is used to find the price for the specific dimensions. One element is added to check the columns, and the other to check the rows.
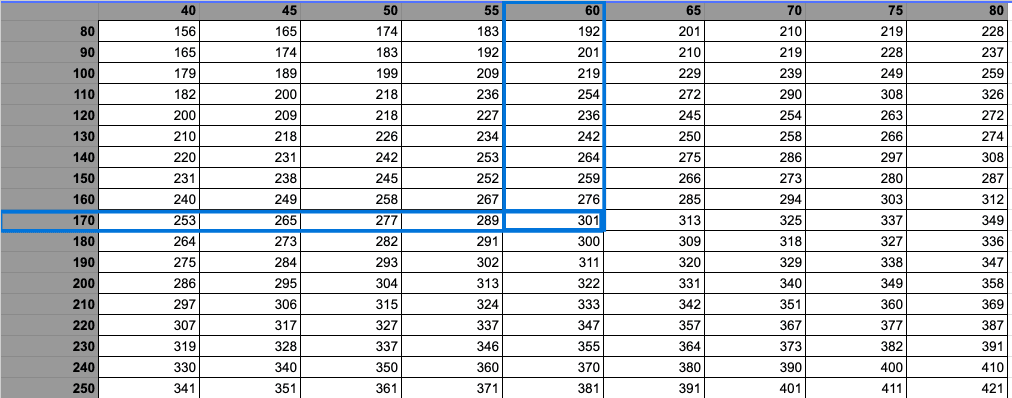
A correctly setup Value Lookup element settings for the wallpaper price calculator:
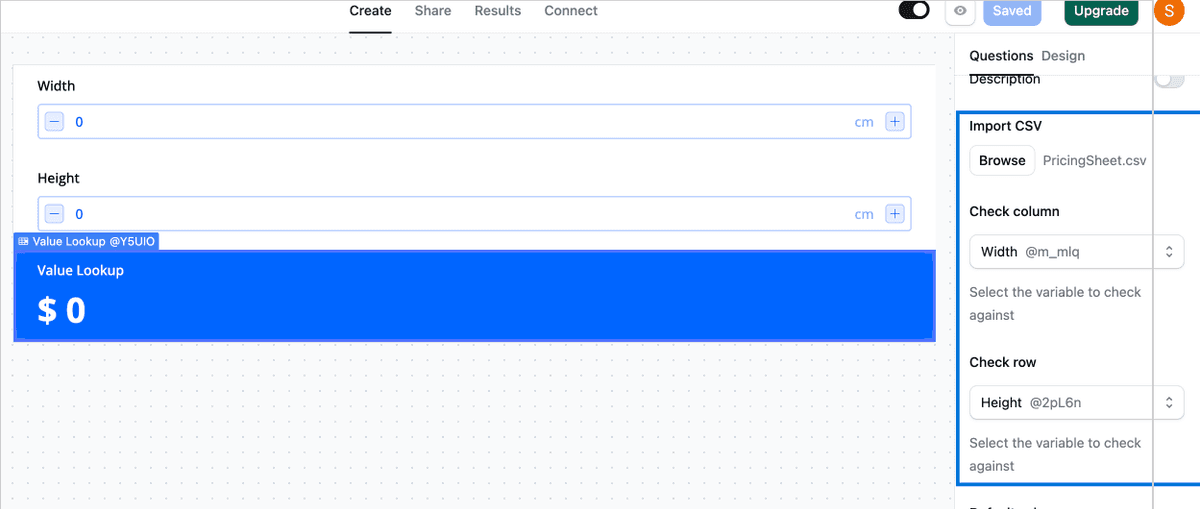
Once the customer inputs Width value to be 60 cm and Height value to be 170 cm, the Value Lookup element finds and returns a value of 301 from the file.

Tips for Effective Use of Value Lookup
- Data in the first row and Column A can be expressed as specific values, ranges, or a combination of both.

- If you need Value Lookup to find a value based on only one variable, use the same values as a range, from the smallest to the largest possible value for the other row or column.
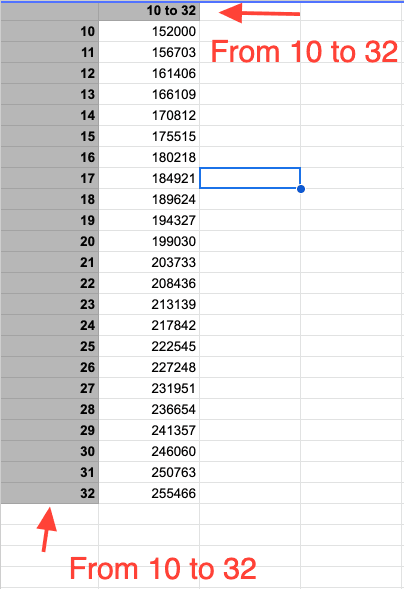
- Ensure all values in your CSV are numeric. Assign numeric values to text options in your calculator elements if necessary.
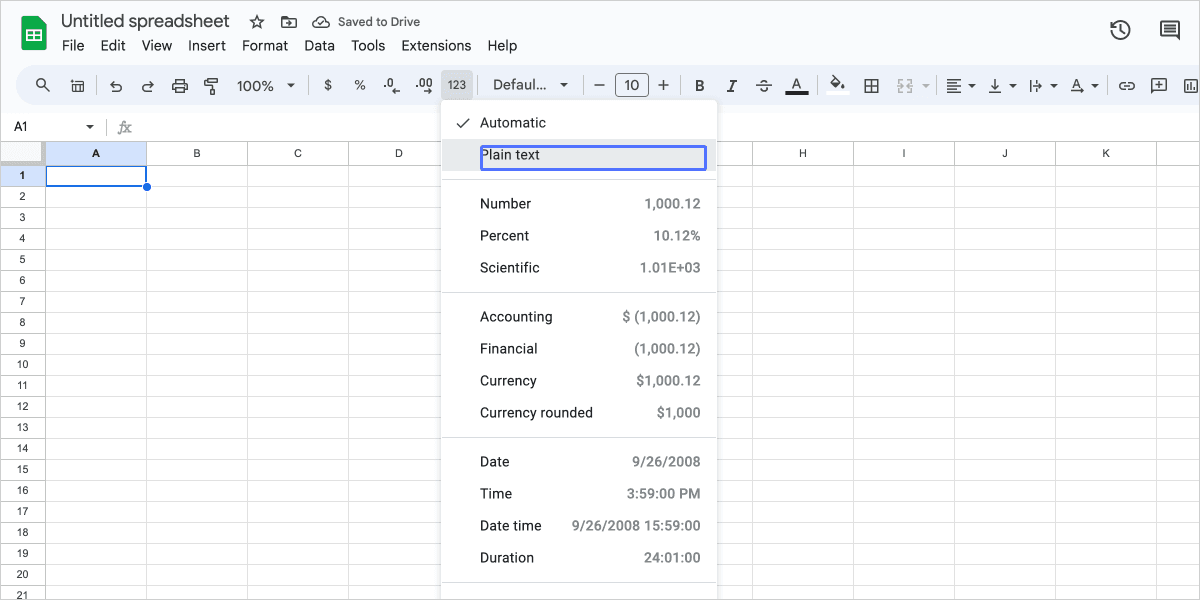
- Use plain text formatting in spreadsheet software to avoid formatting issues.
Want to use Value Lookup Output Value in Calculations
It's important to note that the value returned by the Value Lookup element can be used as a variable in formulas within your calculator. This allows you to perform further calculations based on the looked-up value, enhancing the flexibility and power of your calculator. Additionally, to use the elements in your formulas, simply use existing variables by typing "@" and select from the list of available variables.
For example, you could use the looked-up price in a formula to calculate a discounted price or to determine shipping costs based on the product's price.
For a deeper understanding of how to utilize default and custom variables in your formulas, including those from Value Lookup elements, refer to our detailed guide on custom variables: Utilize Default and Custom Variables.
Troubleshooting and FAQs
Q: Why isn't my Value Lookup element returning any results?
A: Ensure your CSV file is formatted correctly and contains only numeric values.
Q: Can I use text values in my lookup table?
A: No, the Value Lookup element requires numeric values.
Q: How do I update my lookup data?
A: Prepare a new CSV file with updated data and re-import it using the "Import CSV" button in the element settings.